
Create Blog Posts
You can draft, format, and publish engaging blog content in Enrollio, complete with multimedia and AI assistance.
What Is A Blog Post?
Enrollio's Blog Post feature lets you create, format, and publish SEO-ready articles directly from your dashboard. Share enrollment tips, center updates, parenting resources, or local community news—all in one place.
Blog Post Benefits
Creating content inside Enrollio streamlines your marketing, boosts SEO, and keeps families engaged without leaving the platform.
- Centralized content management — write, edit, and publish from one dashboard
- Built-in SEO fields — optimize every post for search engines
- Rich-text & multimedia editor — add images, videos, and audio with ease
- One-click scheduling — publish immediately or schedule for later
- AI-assisted writing — get help outlining and generating copy
Create a Blog Post
Follow these steps to start drafting your article from scratch or with AI assistance:
- Navigate to Sites → Blogs to see your Blog List
- Select an existing Blog for your new post or create a new Blog
- In the blog's page list, click New Post
- You'll see the blank Blog Post Editor
Blog Post Editor
The Blog Post Editor has many controls, but you don't need to learn them all to publish your first post. Here are the essentials:
- Auto-Save: Toggle Auto-Save on (upper right next to the Back button) so you never lose your work
- Title: Give your article a meaningful title
- Text: Write and format your article using the toolbar
- Save and Continue: Save manually as you go, then click Continue when you're done
Advanced Options
Enrich your blog posts with hyperlinks, images, audio, and video.
Add Hyperlinks
- Highlight the text you want to link
- Click the chain icon in the toolbar
- Enter the URL and configuration
- Click Add Link
Add Images
- Click your cursor at the target location
- Click the image icon in the toolbar
- Insert an image using a URL, the Media Library, or create a new one with Image AI
Add Audio
- Click the headphones icon in the toolbar
- Select the audio file from the Media Library
- Configure your settings
- Click Insert Audio
Add Video
- Click the video camera icon in the toolbar
- Add video from the Media Library or YouTube
- Configure your settings
- Click Insert Video
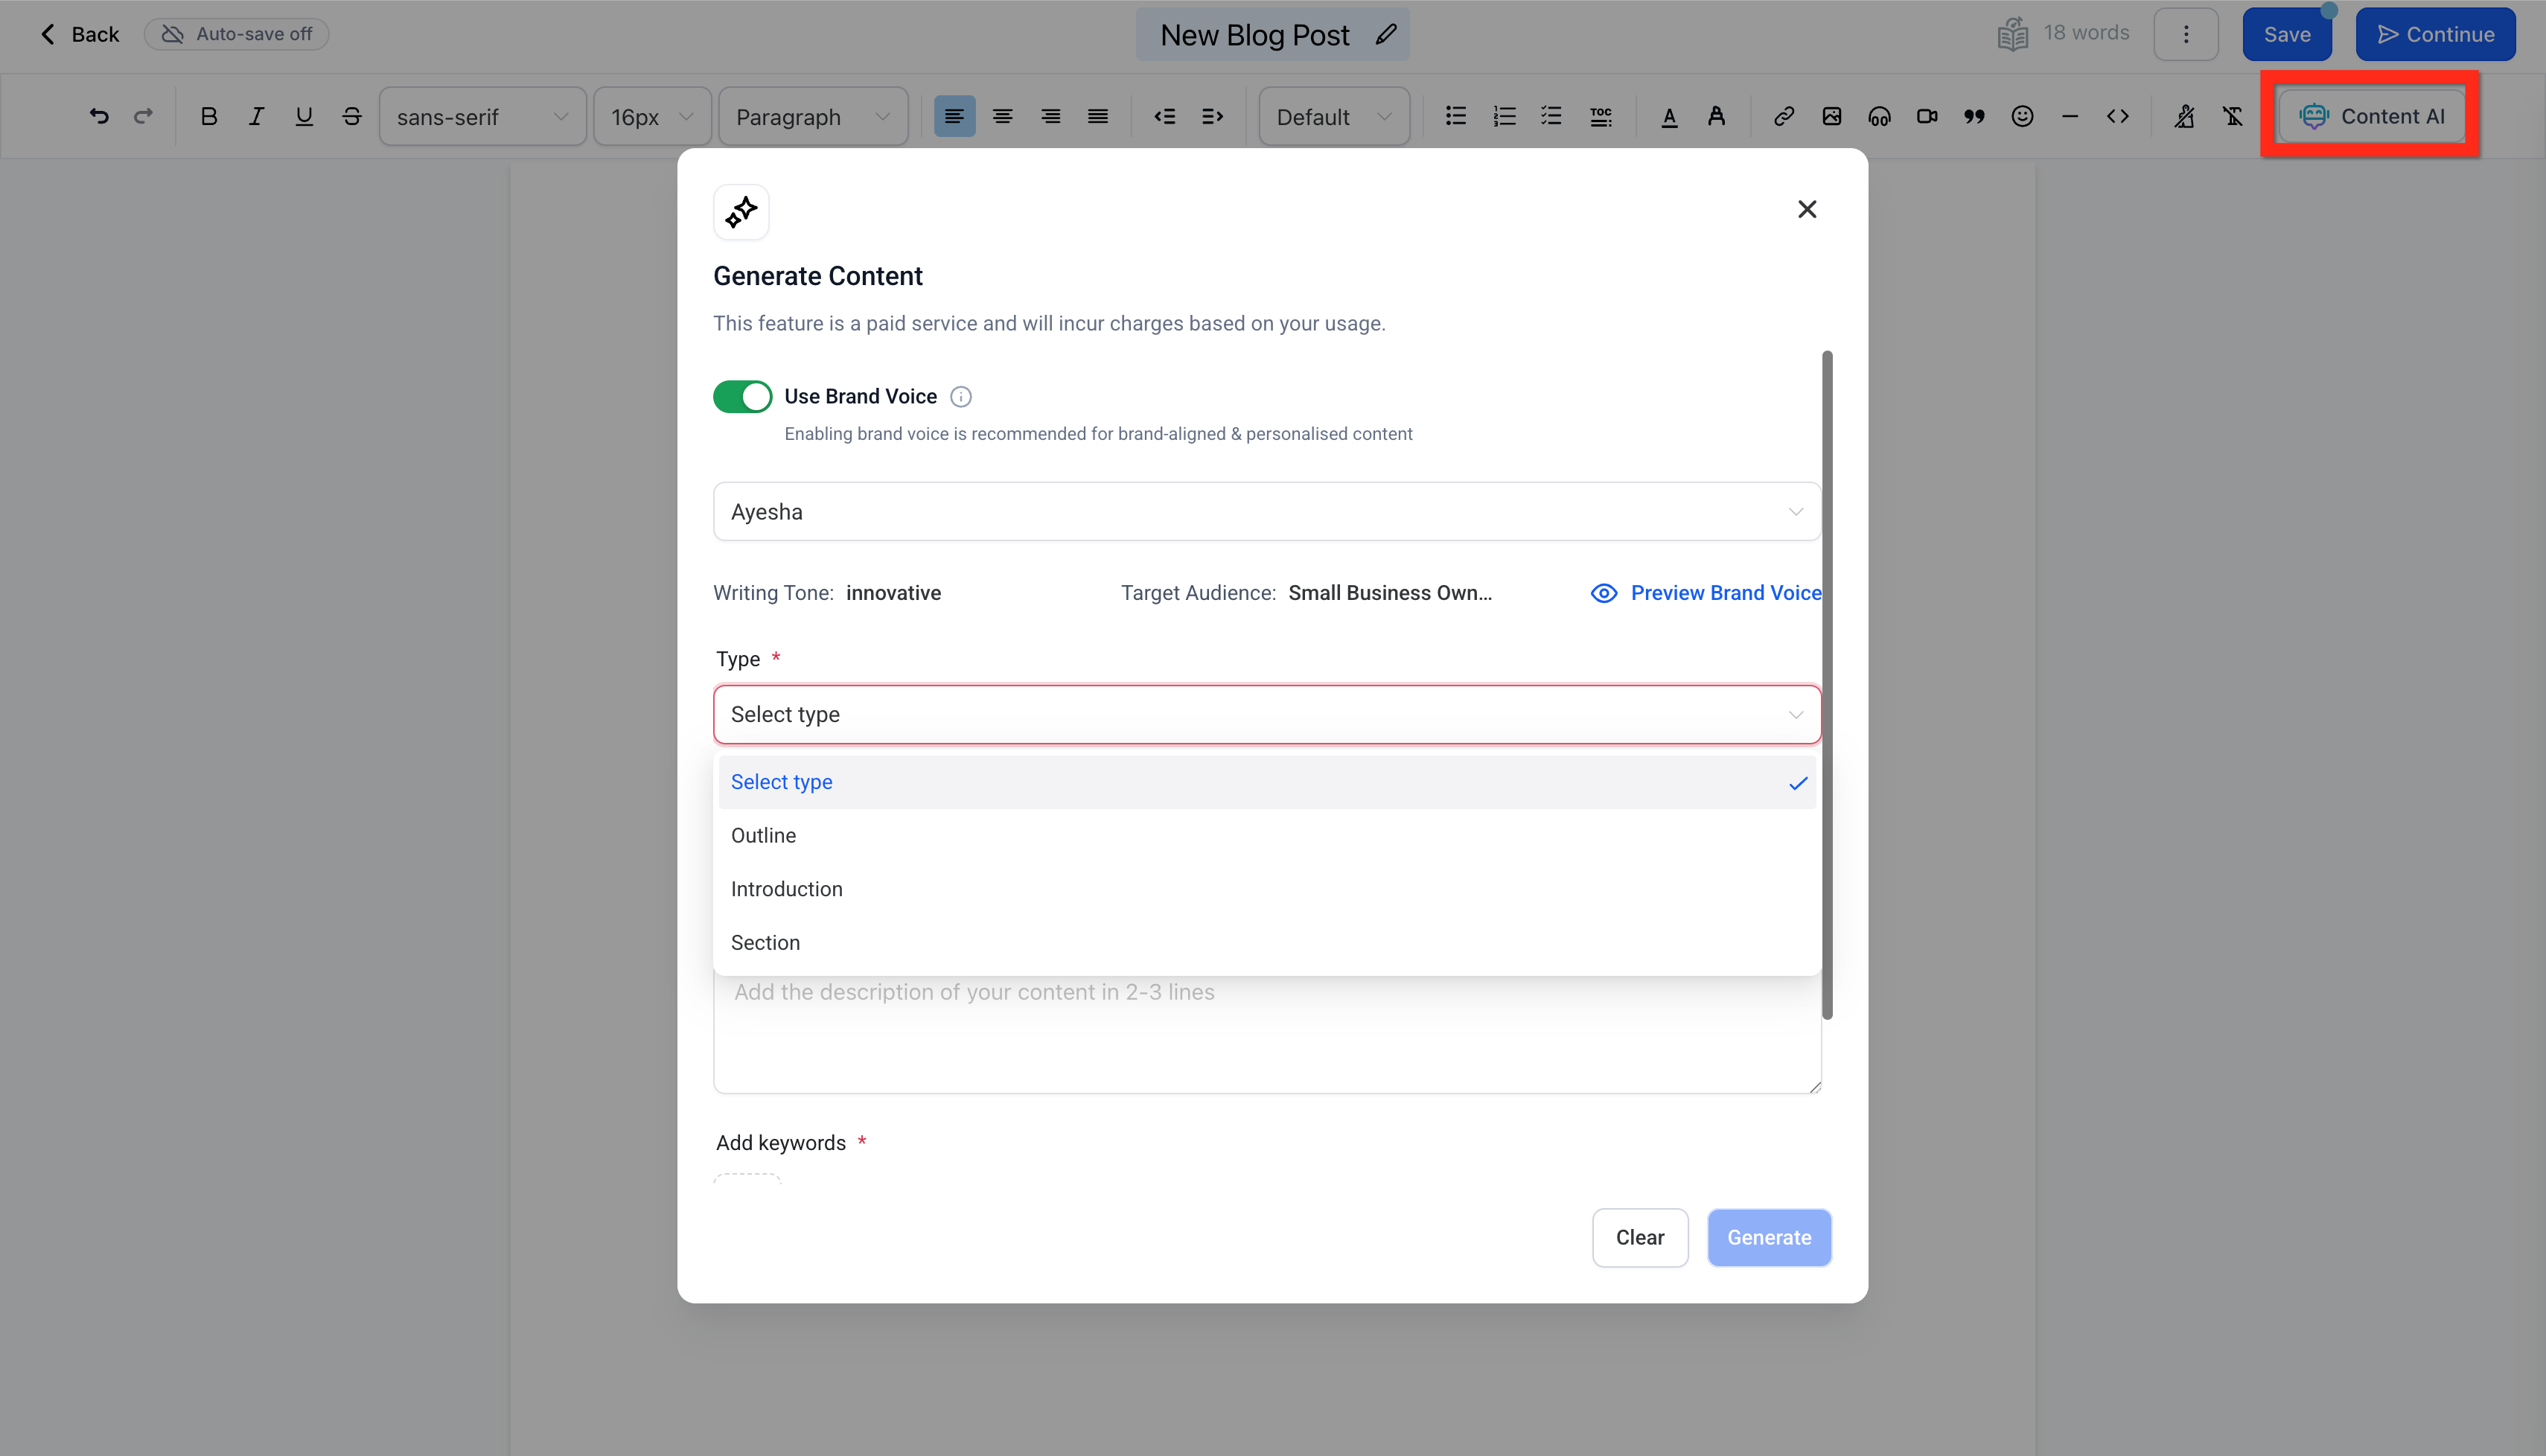
Content AI
If you don't want to write your blog post from scratch, use Content AI to get started.
- Click the Content AI button
- Configure your preferences
- Start writing with AI assistance
Publish & SEO
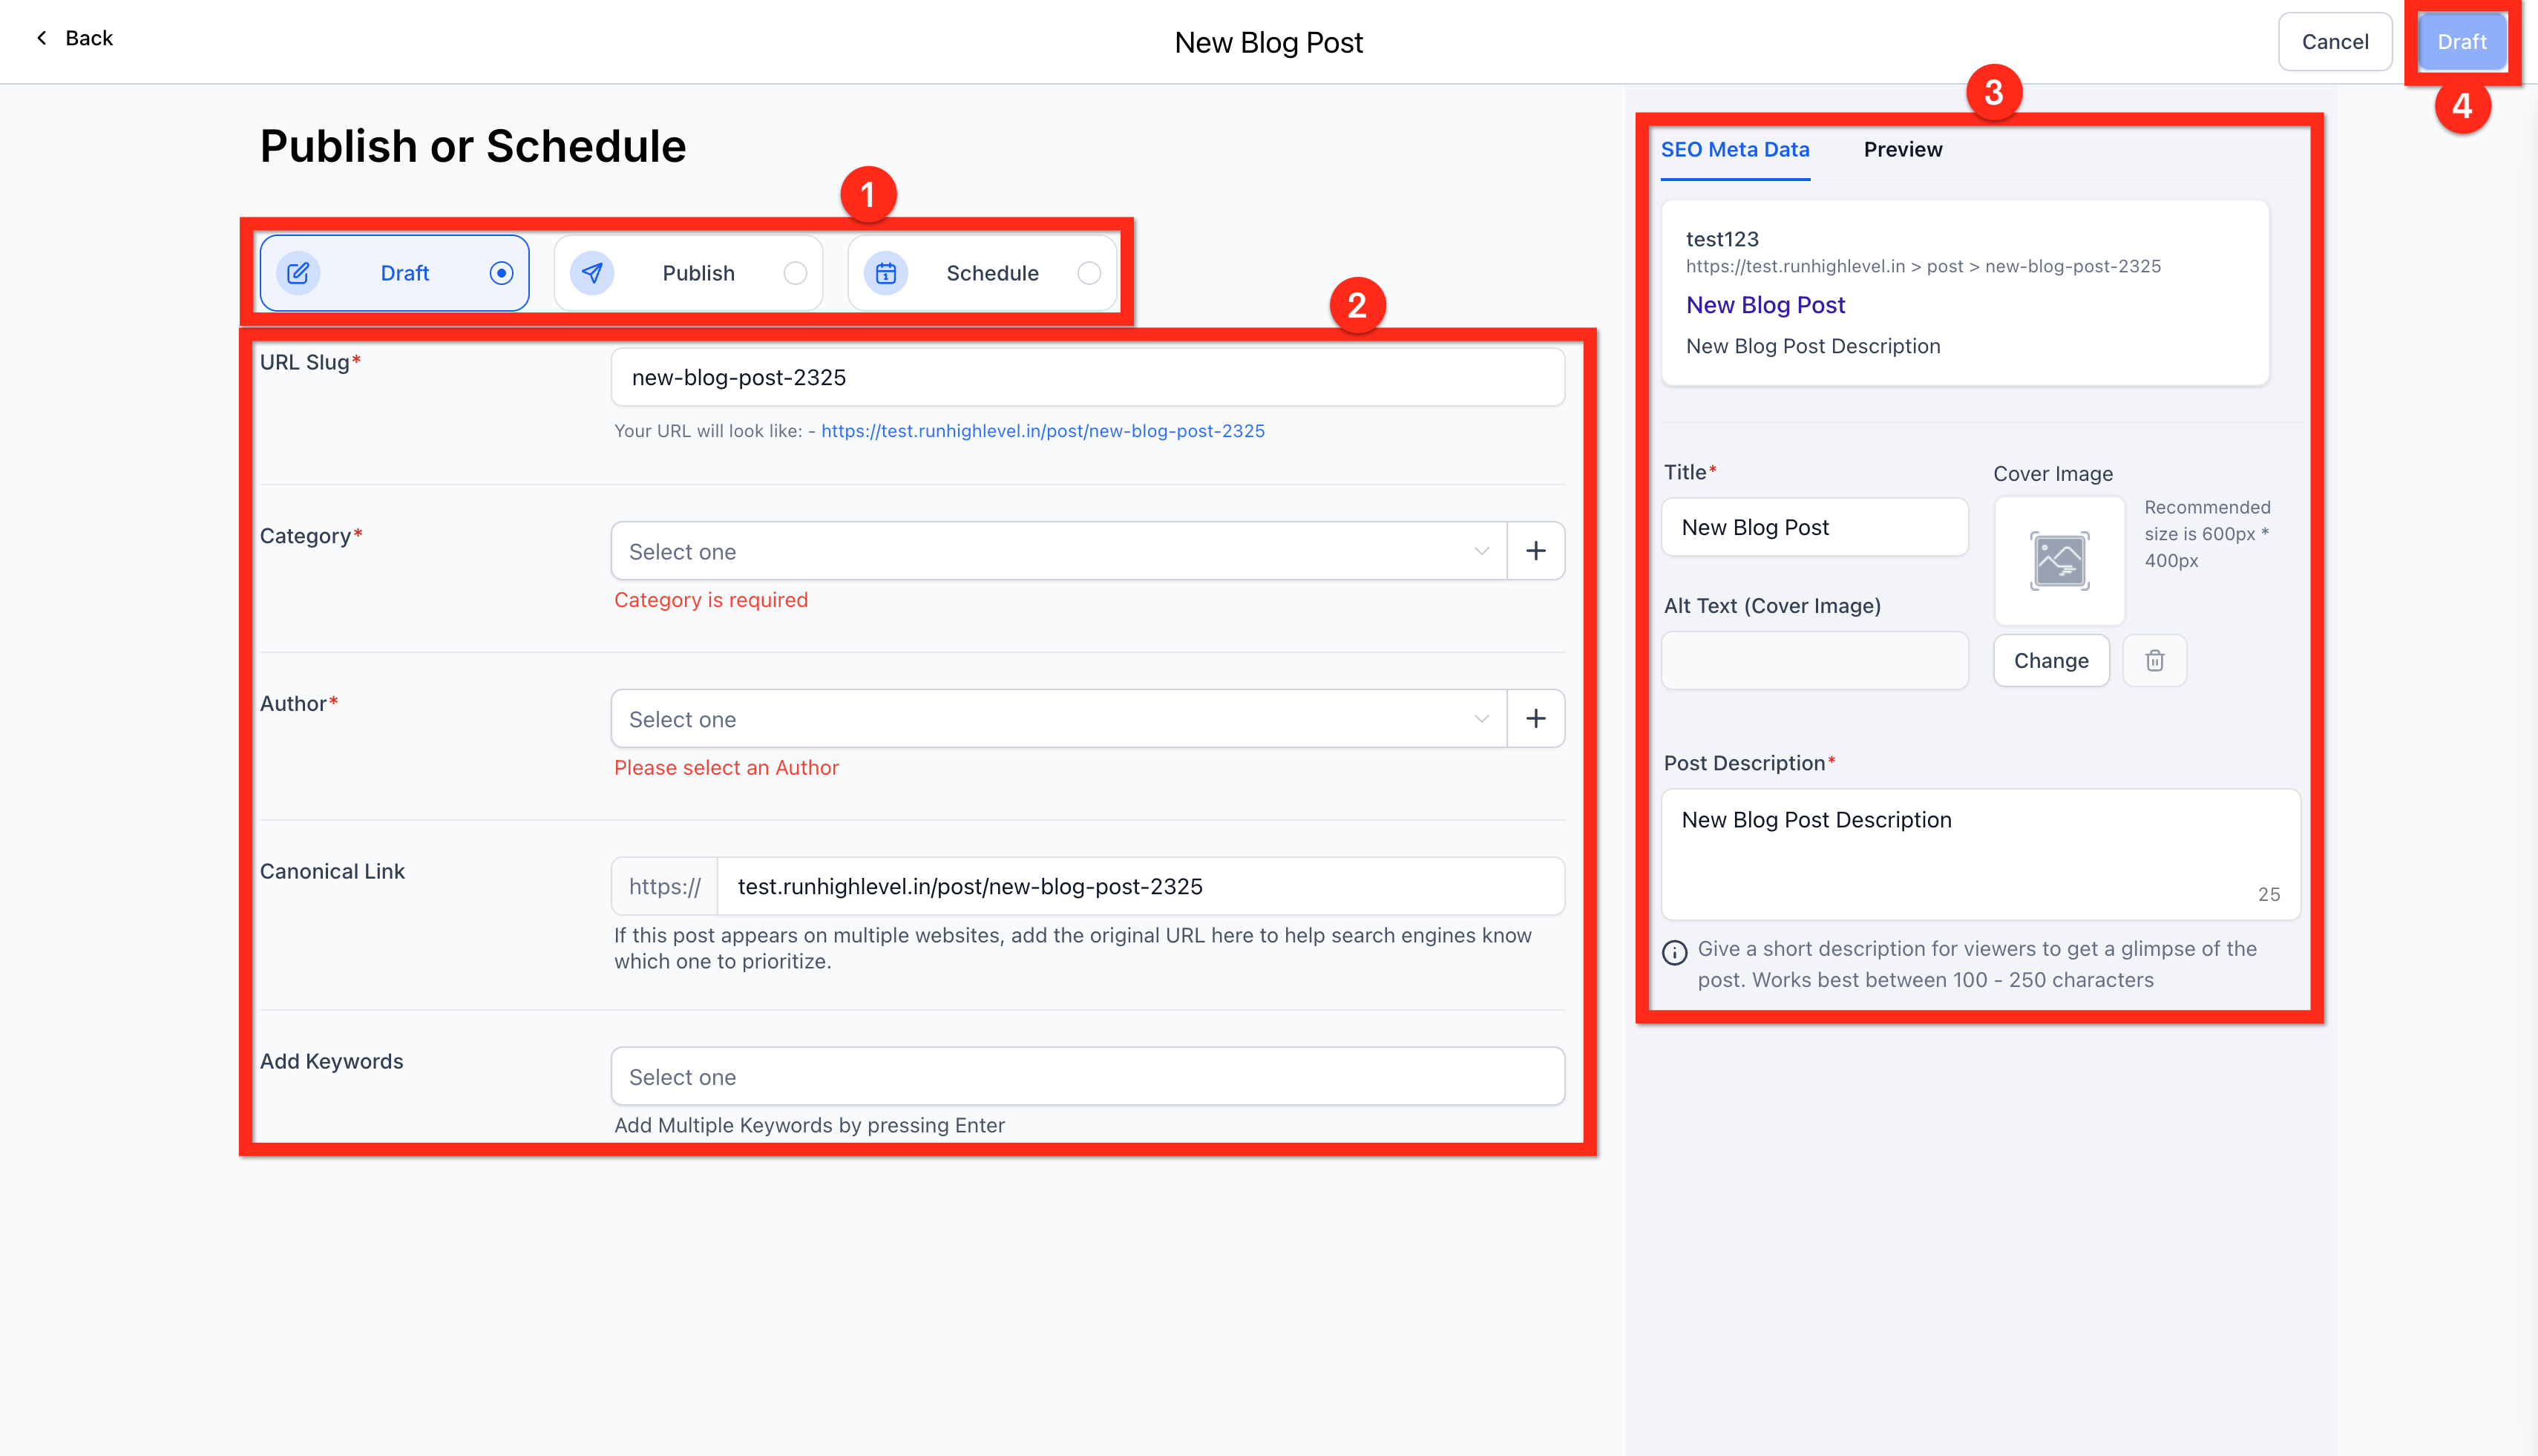
When you're done writing, click Continue to reach the Status and SEO metadata page.
Status
Choose when your post goes live:
- Draft — keep working on it
- Publish — publish today or backdate it
- Schedule — set a future publish date
Record Keeping
Keep your blog organized:
- URL slug — create a clean, readable URL
- Category — group related posts (e.g., "Enrollment Tips," "Parenting Resources," "Center Updates")
- Author — assign a staff member
- Keywords — add relevant search terms
SEO
Optimize your post for search engines:
- Title — the title that appears in search results
- Alt text — describe your images for accessibility and SEO
- Cover Image — choose an eye-catching thumbnail
- Description — write a compelling meta description (160 characters or less)
Done
When everything looks good, click the button in the upper right. It will say Draft, Publish, or Schedule depending on the status you selected.
Comments
Please sign in to leave a comment.